Fast furniture is the fast fashion of home design. Every year, millions of pieces—tables, sofas, chairs—end up in landfills, often just months after being bought. Most of it is made from cheap materials and isn’t built to last. When styles change or people move, it’s easier to toss than repair. That convenience has a cost: wasted resources, crowded dumps, and a bigger carbon footprint.
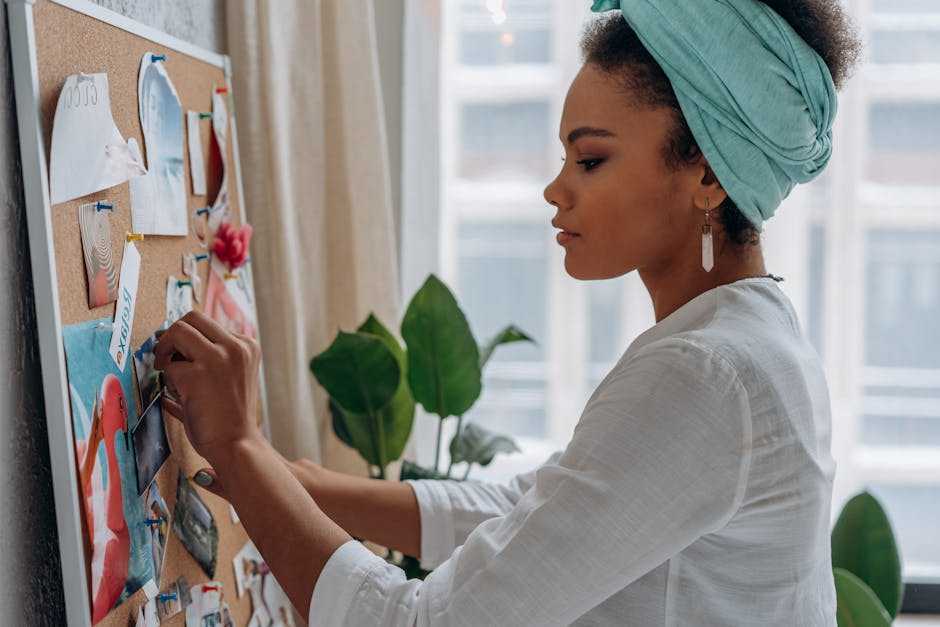
There’s a better way, and it doesn’t mean giving up style. Upcycling—turning old pieces into something new—has gained serious traction. It’s budget-friendly, low-waste, and lets people put a personal stamp on their space. Sometimes it’s as simple as sanding and staining a coffee table. Other times, it’s a full transformation with bold paint or new upholstery. Either way, it’s a reminder that good materials still have value.
Creativity plays a big role. A little effort extends the life of wood, metal, and fabric that’s already stood the test of time. It shifts the goal from throwaway convenience to long-term character. A chair with history doesn’t need to be replaced. It needs a fresh take.
Essential Tools and Materials for a Pro-Level Finish
Whether you’re tackling your first DIY project or just looking to level up your home improvement game, having the right tools and materials is where everything starts. In this section, we’ll cover the basics every beginner should have, plus the key materials that make all the difference when it comes to durability and finish quality.
Basic Toolset: A Beginner’s Must-Haves
If you’re just getting started, here’s a simple toolkit that will take you far:
- Quality paintbrushes in multiple sizes
- Painter’s tape for clean edges
- Drop cloths for protecting floors and furniture
- Disposable gloves and safety goggles
- Stir sticks and paint trays
These tools build the foundation for safe, clean, and smooth results.
Surface Prep 101: Sandpaper, Primers, and Sealants
Great finishes start with great prep. Don’t skip these steps:
- Sandpaper: Keep a variety of grits on hand. Coarse (60–80 grit) for stripping, medium (120–150 grit) for smoothing, and fine (220 grit) for finishing.
- Primers: Use a primer to help paint adhere better and to provide a consistent base coat, especially when covering up stains or dark colors.
- Sealants: These are key before painting damp-prone areas like bathrooms or outdoor pieces. Choose from latex or oil-based sealants based on your project needs.
Finishes That Last: Choosing Paints, Stains, and More
Not all finishes perform the same over time. Here’s what to look for:
- Interior Paint: Go for high-quality acrylic latex for most rooms. It dries fast and is easy to clean.
- Exterior Paint: Invest in weather-resistant formulas made to withstand UV rays, moisture, and extreme temperatures.
- Stains: Use oil-based stains for deeper wood penetration and long-term color stability.
- Polyurethane or Varnishes: A must for protecting surfaces like tabletops, cabinets, and trim.
Pro Tip: When to Upgrade Your Equipment
Manual tools can get you far, but if you’re planning frequent projects or working on larger surfaces, it may be time to invest in power tools.
Consider upgrading to:
- A power sander: Saves you time and ensures uniform surface prep.
- A paint sprayer: Delivers even coats faster, especially on large surfaces like fences, cabinets, or siding.
Invest wisely. These upgrades can significantly boost the quality and efficiency of your work.
Not everything old is worth saving, but the right piece can be a goldmine for upcycling. Solid wood is your best bet. It’s durable, sands well, and can be re-stained or painted multiple times. Particleboard? Pass unless you’re looking for a short-term project. Look for sturdy frames, dovetail joints, or any structure that feels weighty and holds together when you push or pull on it.
A piece is worth saving if it has good bones. Check for cracks, water damage, or warping. Minor scratches or outdated finishes can be fixed. Weak structure or rot? Not worth the trouble. Drawers should slide cleanly. Doors should close properly. If it just needs a little tightening or cosmetic love, grab it.
As for where to find the good stuff: thrift stores are a classic start, but don’t skip estate sales. They’re often packed with hidden gems at better prices. Also, curbside finds have serious potential—especially in high-turnover neighborhoods or during moving season. One person’s bulky junk is often your next upcycled standout.
Old furniture isn’t dead weight. With a bit of effort, it’s raw material for striking DIY upgrades.
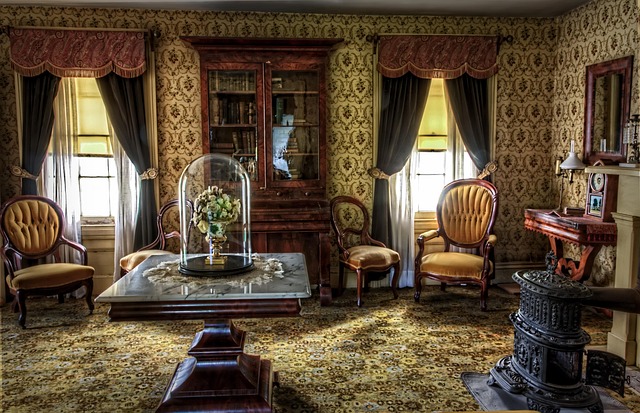
Take a solid wood dresser. With a new sink, plumbing cutouts, and a sealed top, it turns into a standout bathroom vanity that outclasses most prefab options. Those boxy vintage chairs hiding in granny’s attic? Wrap them in bold fabrics and you’ve instantly got statement seating that feels fresh, not fussy.
Kitchen cabinets are another target. You don’t need a rip-out—just sand, paint in a modern tone, and switch outdated hardware for clean lines. The room changes overnight.
That wobbly table with a broken leg isn’t trash either. Break it down and turn its surface into floating shelves or small plant stands. It’s about rethinking shapes, not tossing them. Want to get started? Here’s a DIY guide for making shelves: How to Build a Floating Shelf with Simple Materials.
Getting a high-end finish starts long before the first coat of paint. Surface prep is everything. Strip off old finishes, sand thoroughly, and clean with a tack cloth. You’re not trying to rush it. The smoother and cleaner the surface, the better the paint will bond—and stay put.
When it comes to layering paint, thin coats win. Start with a quality primer, then build up color with two or three light passes. Mix up the tones slightly between layers for added depth if you’re going for a more textured or aged look. Let each layer dry fully. No shortcuts.
Fake-looking distressing kills the vibe. Skip the over-sanded corners and go for natural wear points—think handles, edges, or spots you’d actually touch. Use fine grit or a dry brush technique to take off just enough to suggest real use, not drama.
Finally, hardware and trim can make or break the finished product. Swap out knobs with weight and personality. When adding legs or trim, measure twice, attach cleanly, and paint or stain them to match—or contrast, if that’s the look. The goal is custom, not cobbled together.
Painting can take a space from bland to bold, but skipping the basics turns quick wins into long-term regrets. Prepping the surface properly isn’t just a suggestion, it’s non-negotiable. Skipping sanding or ignoring dust means your paint won’t stick well and won’t last.
Then there’s paint itself. Using the wrong kind or skipping a sealant can wreck the final look. Matte when you need satin? No sealant in a high-wear area? Big mistake.
Don’t paint over structural issues either. Covering cracks, rot, or leaks won’t make them go away. It just masks the problem and costs more down the road.
And while personality matters, doing too much with color and pattern can tip from quirky to chaotic. It’s easy to lose cohesion when every wall screams for attention. A smart design choice draws focus, not confusion.
Upcycling isn’t just about saving materials or staying trendy. It’s about viewing your world through a different lens. One where the old shirt, broken shelf, or cracked ceramic mug gets a second chance. In vlogging, this mindset can be powerful—because every item you repurpose becomes part of your story.
Each piece holds its own history. When you upcycle, you’re not erasing that past—you’re giving it a new chapter. Repainting, reshaping, rebuilding—it doesn’t have to be flawless. In fact, the quirks are the good parts. They show who you are and how you see things.
Don’t chase sterile perfection. Strong upcycling highlights utility, personality, and resourcefulness. Whether it’s turning thrifted denim into a camera strap or making a plant stand from an old skateboard, the goal is to create something useful that shows your hand in the process—something with character.
 There is a specific skill involved in explaining something clearly — one that is completely separate from actually knowing the subject. Vicky Skinneriez has both. They has spent years working with gardening and landscaping tips in a hands-on capacity, and an equal amount of time figuring out how to translate that experience into writing that people with different backgrounds can actually absorb and use.
Vicky tends to approach complex subjects — Gardening and Landscaping Tips, Home Improvement Essentials, Interior Renovation Ideas being good examples — by starting with what the reader already knows, then building outward from there rather than dropping them in the deep end. It sounds like a small thing. In practice it makes a significant difference in whether someone finishes the article or abandons it halfway through. They is also good at knowing when to stop — a surprisingly underrated skill. Some writers bury useful information under so many caveats and qualifications that the point disappears. Vicky knows where the point is and gets there without too many detours.
The practical effect of all this is that people who read Vicky's work tend to come away actually capable of doing something with it. Not just vaguely informed — actually capable. For a writer working in gardening and landscaping tips, that is probably the best possible outcome, and it's the standard Vicky holds they's own work to.
There is a specific skill involved in explaining something clearly — one that is completely separate from actually knowing the subject. Vicky Skinneriez has both. They has spent years working with gardening and landscaping tips in a hands-on capacity, and an equal amount of time figuring out how to translate that experience into writing that people with different backgrounds can actually absorb and use.
Vicky tends to approach complex subjects — Gardening and Landscaping Tips, Home Improvement Essentials, Interior Renovation Ideas being good examples — by starting with what the reader already knows, then building outward from there rather than dropping them in the deep end. It sounds like a small thing. In practice it makes a significant difference in whether someone finishes the article or abandons it halfway through. They is also good at knowing when to stop — a surprisingly underrated skill. Some writers bury useful information under so many caveats and qualifications that the point disappears. Vicky knows where the point is and gets there without too many detours.
The practical effect of all this is that people who read Vicky's work tend to come away actually capable of doing something with it. Not just vaguely informed — actually capable. For a writer working in gardening and landscaping tips, that is probably the best possible outcome, and it's the standard Vicky holds they's own work to.