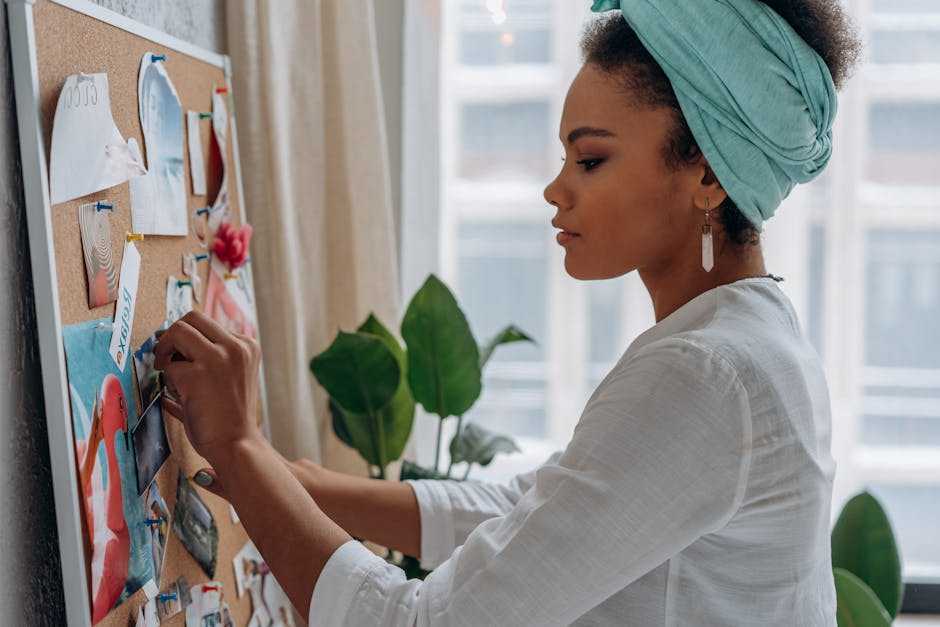
Peel-and-stick design solutions have become a go-to for renters, DIYers, and anyone looking for fast, stress-free upgrades. No paste, no tools, no drywall disaster. Apply, smooth down, and you’re good. Whether it’s wallpaper, backsplash tiles, or floor decals, the appeal is simple: no commitment, all style.
These updates are quick wins. Want to change the vibe of a room without shelling out for a full reno? Peel-and-stick gets it done for a fraction of the cost. Even better, when you’re ready for a new look or you’re moving out, you just peel it off. No damage. No deposit lost. It’s design that fits real life.
- Peel-and-stick wallpaper (buy 10% more than you think you need): Always plan for slight errors or pattern matching. It’s better to have a little leftover than come up short.
- Measuring tape: Accuracy is non-negotiable. Measure twice, apply once.
- Level or laser level: Keep things straight. Crooked wallpaper ruins the look, no matter how bold the print.
- Pencil: Light markings help guide your cuts and placements. Just don’t press too hard.
- Sharp utility knife or X-Acto blade: Clean edges make a big difference. Dull blades will tear or drag.
- Squeegee or smoothing tool: Smooth air bubbles and creases as you go. Your hands won’t cut it.
- Step stool or ladder: Vital for ceilings and top edges. Reach matters.
- Clean, dust-free wall surface: Prep is everything. Dust, grime, or old paint flakes will mess with adhesion.
Before doing anything else, clean the wall with mild soap and water. Skip anything harsh. You’re just clearing away dust, grease, and whatever else might keep things from sticking. Let it dry completely. No shortcuts here.
Next, remove any nails, wall hooks, or outlet covers. Anything that sticks out or could get in the way needs to go. That also means unplugging anything you’ve got on that wall.
Then take a hard look at the surface. Patch any holes with filler and sand down rough or uneven spots. You’re aiming for a smooth surface. The cleaner and flatter the wall, the cleaner the final look.
One more thing: if the wall’s been freshly painted, give it time to cure. Three to four weeks is standard. Rushing it could mess with adhesion, and you don’t want to risk a redo down the line.
Start by measuring both the height and width of each wall section where the panels will go. Don’t eyeball it—get the tape measure and write it down. These numbers are your guide.
Next, use a level and mark vertical guidelines on the wall. These lines act like tracks, helping you keep your panels straight as you install. Even a slight tilt can throw off the whole look, especially with patterned panels.
Before committing to any adhesive, dry-fit the first panel in place. Just hold it up. This gives you a chance to visualize how the pattern sits and how it will connect with the next panels. Make adjustments now while it’s easy. Once you peel and stick, there’s no undo button.
Start by peeling about 12 inches of the backing from the top of your wallpaper panel. Don’t yank it all off at once — that’s asking for trouble. Line up the top edge with your guideline and stick it to the wall, pressing firmly to secure it. From there, smooth the panel downward as you go, working top to bottom with your hands or a squeegee. Take your time and keep the paper tight to avoid bubbles or wrinkles. Keep pulling off more of the backing gradually. It’s a slow roll, not a sprint.
Precision Cutting Makes or Breaks the Finish
Clean lines are one of the biggest visual indicators of professional-quality work. Whether you’re painting, tiling, or installing trim, this step demands focus and control. Don’t treat it as an afterthought—your finish depends on it.
Tools That Matter
To get clean, crisp edges, you need more than patience. You need the right tools in your hand.
- Use a sharp utility blade
- A metal straight edge helps guide smooth, even cuts
- Keep extra blades on hand—dull ones tear instead of slice
Cut Carefully Along Key Areas
Some spots require extra attention. These high-visibility areas can instantly elevate or ruin the final look.
- Score precisely along moldings and baseboards
- Cut around outlets and irregular edges using a steady hand
- Use painter’s tape as a guide when needed
Slow Is Smooth, Smooth Is Fast
Speed isn’t the goal here—accuracy is. Rushing through cuts leads to mistakes that are hard to disguise later.
- Take your time
- Avoid tearing, uneven lines, or sloppy borders
- Quality at this stage defines the final appearance
Getting the details right during wallpaper installation can save you hours of rework. Start by aligning the pattern or seams with care. Even small misalignments will stand out once everything’s up. If the paper allows, a slight overlap between strips is fine—it can help avoid gaps as the material settles. When applying the wallpaper, use a squeegee to press out air pockets. Most bubbles come from trapped air, not faulty adhesive, so press slowly and firmly. And if your focus starts to slip, walk away for a bit. Rushing leads to mistakes, and in wallpapering, every mistake shows.
Once everything is in place, it’s time for a final check. Look closely for any air bubbles, corners lifting, or seams that aren’t lining up. These little details can ruin the finish if ignored. If you spot an edge peeling up, don’t panic. A bit of gentle heat from a hairdryer can soften the adhesive and help you press it back down smoothly. Just don’t overdo it – short bursts, light pressure. After your touch-ups, take a step back. The difference might not scream at you, but it’s there. Clean lines, smoothed edges, and no warping. That’s how you know you did it right.
Avoid applying peel-and-stick decor to textured or damp walls. It just won’t hold. Moisture and uneven surfaces mess with adhesion, causing edges to curl or entire sections to peel off prematurely.
If you place something wrong, don’t panic. Peel it slowly from one edge and realign carefully. Forcing it usually leads to stretching or tearing, especially with thinner materials.
Need more ideas to upgrade your space without breaking the bank? Check out our guide on Upcycling Furniture: Creative Makeovers for Old Pieces.
Peel-and-stick wallpaper used to be what you grabbed for a quick fix. Not anymore. It’s become a legit design tool for creators who care about detail and speed. The modern versions come in high-quality materials, realistic textures, and fresh patterns that actually hold up on camera.
For vloggers, that’s a win. You can transform a backdrop in under an hour and switch it out the next week if a new trend hits. No paste, no tools, no waiting. And done right, it looks just as polished as traditional wallpaper. It’s about working smarter, not cheaper.
In a content landscape where visual impact matters and time is tight, peel-and-stick is proving it’s not just a shortcut. It’s part of the strategy.
 Jarvison Nagyan writes the kind of home improvement essentials content that people actually send to each other. Not because it's flashy or controversial, but because it's the sort of thing where you read it and immediately think of three people who need to see it. Jarvison has a talent for identifying the questions that a lot of people have but haven't quite figured out how to articulate yet — and then answering them properly.
They covers a lot of ground: Home Improvement Essentials, Interior Renovation Ideas, Home Design Inspirations, and plenty of adjacent territory that doesn't always get treated with the same seriousness. The consistency across all of it is a certain kind of respect for the reader. Jarvison doesn't assume people are stupid, and they doesn't assume they know everything either. They writes for someone who is genuinely trying to figure something out — because that's usually who's actually reading. That assumption shapes everything from how they structures an explanation to how much background they includes before getting to the point.
Beyond the practical stuff, there's something in Jarvison's writing that reflects a real investment in the subject — not performed enthusiasm, but the kind of sustained interest that produces insight over time. They has been paying attention to home improvement essentials long enough that they notices things a more casual observer would miss. That depth shows up in the work in ways that are hard to fake.
Jarvison Nagyan writes the kind of home improvement essentials content that people actually send to each other. Not because it's flashy or controversial, but because it's the sort of thing where you read it and immediately think of three people who need to see it. Jarvison has a talent for identifying the questions that a lot of people have but haven't quite figured out how to articulate yet — and then answering them properly.
They covers a lot of ground: Home Improvement Essentials, Interior Renovation Ideas, Home Design Inspirations, and plenty of adjacent territory that doesn't always get treated with the same seriousness. The consistency across all of it is a certain kind of respect for the reader. Jarvison doesn't assume people are stupid, and they doesn't assume they know everything either. They writes for someone who is genuinely trying to figure something out — because that's usually who's actually reading. That assumption shapes everything from how they structures an explanation to how much background they includes before getting to the point.
Beyond the practical stuff, there's something in Jarvison's writing that reflects a real investment in the subject — not performed enthusiasm, but the kind of sustained interest that produces insight over time. They has been paying attention to home improvement essentials long enough that they notices things a more casual observer would miss. That depth shows up in the work in ways that are hard to fake.